bootstrapを使用したログイン画面(ログインフォーム)の作成を目指しながら、Bootstrapの実践知識を補足していきます。
この記事の目次です。
1. ログインフォームのHTML
2. 青いボタン(btn btn-primary)
3. 水平方向に中央寄せ(text-center)
4. 垂直方向に中央寄せ(独自のスタイル適用)
5. カード形式の枠を作る(card、card-XXX)
6. フォームに効果をつける(form-control)
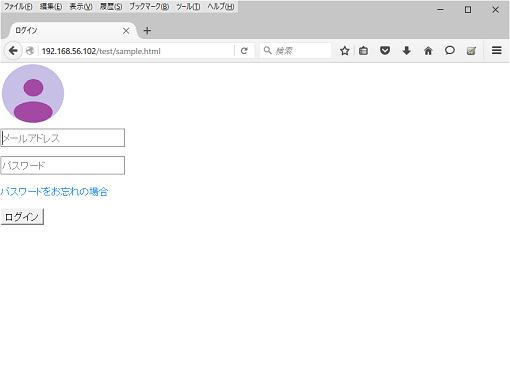
まずはログインフォームのHTMLを見ていきます。 「bootstrap.min.css」を取り込んだだけですが、素よりきれいですね。
/test
│  sample.html
├─css
│      bootstrap.min.css
└─img
        account-icon.png
<!doctype html>
<html lang="ja">
<head>
<meta charset="utf-8">
<meta name="viewport" content="width=device-width, initial-scale=1, shrink-to-fit=no">
<title>ログイン</title>
<link rel="stylesheet" href="css/bootstrap.min.css">
</head>
<body>
<form>
<h1><img src="img/account-icon.png" alt="ログイン"/></h1>
<p><input type="email" placeholder="メールアドレス" required autofocus></p>
<p><input type="password" placeholder="パスワード" required></p>
<p><a href="#">パスワードをお忘れの場合</a></p>
<p><button type="submit">ログイン</button></p>
</form>
</body>
</html>
まだ「bootstrap.min.css」を取り込んだだけです。 account-icon.pngは自作したものです。
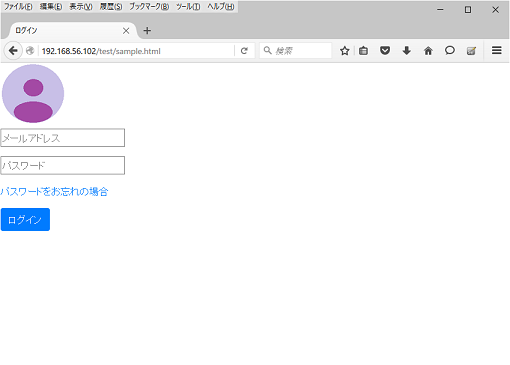
今度はボタンをカスタマイズして青いボタンに変更していきます。
/test
│  sample.html
├─css
│      bootstrap.min.css
└─img
        account-icon.png
<!doctype html>
<html lang="ja">
<head>
<meta charset="utf-8">
<meta name="viewport" content="width=device-width, initial-scale=1, shrink-to-fit=no">
<title>ログイン</title>
<link rel="stylesheet" href="css/bootstrap.min.css">
</head>
<body>
<form>
<h1><img src="img/account-icon.png" alt="ログイン"/></h1>
<p><input type="email" placeholder="メールアドレス" required autofocus></p>
<p><input type="password" placeholder="パスワード" required></p>
<p><a href="#">パスワードをお忘れの場合</a></p>
<p><button class="btn btn-primary" type="submit">ログイン</button></p>
</form>
</body>
</html>
bootstrapで青いボタンを表示するにはclass属性に「btn btn-primary」を指定します。
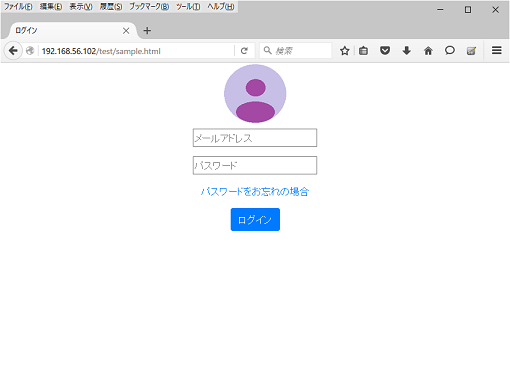
今度はログインフォームを水平方向の中央に寄せていきます。
/test
│  sample.html
├─css
│      bootstrap.min.css
└─img
        account-icon.png
<!doctype html>
<html lang="ja">
<head>
<meta charset="utf-8">
<meta name="viewport" content="width=device-width, initial-scale=1, shrink-to-fit=no">
<title>ログイン</title>
<link rel="stylesheet" href="css/bootstrap.min.css">
</head>
<body>
<form class="text-center">
<h1><img src="img/account-icon.png" alt="ログイン"/></h1>
<p><input type="email" placeholder="メールアドレス" required autofocus></p>
<p><input type="password" placeholder="パスワード" required></p>
<p><a href="#">パスワードをお忘れの場合</a></p>
<p><button class="btn btn-primary" type="submit">ログイン</button></p>
</form>
</body>
</html>
あるブロック内で左右水平方向の中央に寄せたい場合はclass属性に「text-center」を指定します。
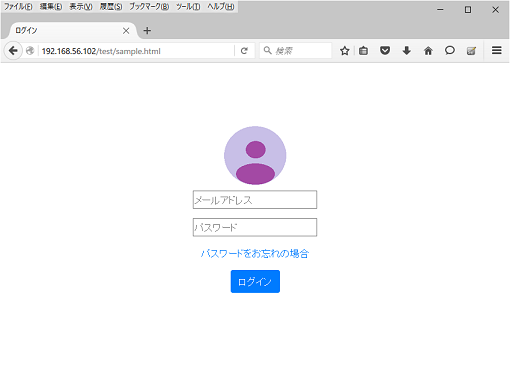
今度はログインフォームを垂直方向に中央に寄せていきます。
/test
│  sample.html
├─css
│      bootstrap.min.css
└─img
        account-icon.png
<!doctype html>
<html lang="ja">
<head>
<meta charset="utf-8">
<meta name="viewport" content="width=device-width, initial-scale=1, shrink-to-fit=no">
<title>ログイン</title>
<link rel="stylesheet" href="css/bootstrap.min.css">
<style>
html {
	height: 100%;
	margin: 0 auto;
	padding: 0;
	display: table;
}
body {
	min-height: 100%;
	margin: 0 auto;
	padding: 0;
	display: table-cell;
	vertical-align: middle;
}
</style>
</head>
<body>
<form class="text-center">
<h1><img src="img/account-icon.png" alt="ログイン"/></h1>
<p><input type="email" placeholder="メールアドレス" required autofocus></p>
<p><input type="password" placeholder="パスワード" required></p>
<p><a href="#">パスワードをお忘れの場合</a></p>
<p><button class="btn btn-primary" type="submit">ログイン</button></p>
</form>
</body>
</html>
bootstrapでの画面の垂直方向に中央寄せする方法は見当たりませんでした。 独自のスタイルを適用することでかゆい所は解決できます。
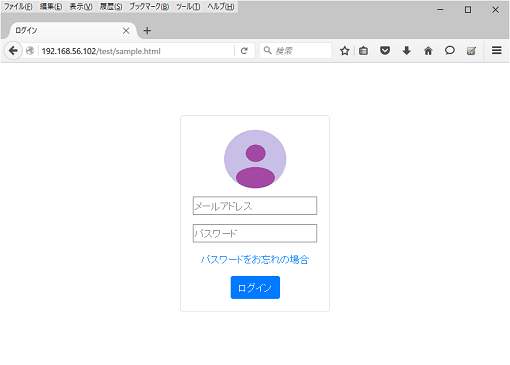
今度はログインフォームにカード形式の枠をつけていきます。
/test
│  sample.html
├─css
│      bootstrap.min.css
└─img
        account-icon.png
<!doctype html>
<html lang="ja">
<head>
<meta charset="utf-8">
<meta name="viewport" content="width=device-width, initial-scale=1, shrink-to-fit=no">
<title>ログイン</title>
<link rel="stylesheet" href="css/bootstrap.min.css">
<style>
html {
	height: 100%;
	margin: 0 auto;
	padding: 0;
	display: table;
}
body {
	min-height: 100%;
	margin: 0 auto;
	padding: 0;
	display: table-cell;
	vertical-align: middle;
}
</style>
</head>
<body>
<form class="text-center card">
<div class="card-body">
<h1 class="card-title"><img src="img/account-icon.png" alt="ログイン"/></h1>
<p class="card-text"><input type="email" placeholder="メールアドレス" required autofocus></p>
<p class="card-text"><input type="password" placeholder="パスワード" required></p>
<p class="card-text"><a href="#">パスワードをお忘れの場合</a></p>
<p class="card-text"><button class="btn btn-primary" type="submit">ログイン</button></p>
</div>
</form>
</body>
</html>
bootstrapの「card」「card-body」「card-title」「card-text」などの「card-XXX」を使用してカード形式を作ることができます。
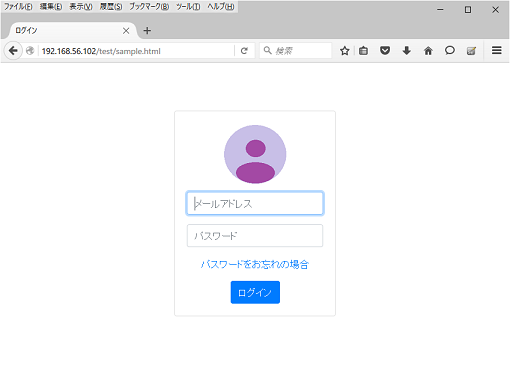
今度はログインフォームにカード形式の枠をつけていきます。
/test
│  sample.html
├─css
│      bootstrap.min.css
└─img
        account-icon.png
<!doctype html>
<html lang="ja">
<head>
<meta charset="utf-8">
<meta name="viewport" content="width=device-width, initial-scale=1, shrink-to-fit=no">
<title>ログイン</title>
<link rel="stylesheet" href="css/bootstrap.min.css">
<style>
html {
	height: 100%;
	margin: 0 auto;
	padding: 0;
	display: table;
}
body {
	min-height: 100%;
	margin: 0 auto;
	padding: 0;
	display: table-cell;
	vertical-align: middle;
}
</style>
</head>
<body>
<form class="text-center card">
<div class="card-body">
<h1 class="card-title"><img src="img/account-icon.png" alt="ログイン"/></h1>
<p class="card-text"><input class="form-control" type="email" placeholder="メールアドレス" required autofocus></p>
<p class="card-text"><input class="form-control" type="password" placeholder="パスワード" required></p>
<p class="card-text"><a href="#">パスワードをお忘れの場合</a></p>
<p class="card-text"><button class="btn btn-primary" type="submit">ログイン</button></p>
</div>
</form>
</body>
</html>
bootstrapの「form-control」を指定するとフォームに効果がつけられます。
もっと知識を広げるための参考です。
Bootstrapは、UIまで手が回らないエンジニアにうれしい「CSSやJavaScript」のライブラリです。 デザイン面のすぐれた豊富なテンプレートに加え、デバイスやブラウザ依存を吸収してくれます。 この記事ではBootstrapの入門知識からBootstrap4の管理画面用のテンプレートの利用まで解説していきます。
この記事の更新履歴です。
スポンサーリンク
サイト内のページ
 言語
言語
C・C++
/HTML
/Java
/JavaScript
/PHP
/シェルスクリプト
 開発環境
開発環境
Ant
/Burp
/Eclipse
/Fiddler
/gcc
/gdb
/Git
/g++
/JDK
/JMeter
/JUnit
/Teraterm
/ZAP
 技術・仕様
技術・仕様
Ajax
/CORBA
/Jakarta EE(旧称J2EE、Java EE)
/JNI
 ライブラリ/Framework/CMS
bootstrap
/jQuery
/FuelPHP
/Lucene
/MyBatis
/Seasar2
/Spring
/Struts
/WordPress
 Web API
Google Maps
 ITインフラ
 OSとミドルウェア
Linux
/Windows
/シェル
ActiveMQ
/Tomcat
/MariaDB
/MySQL
/Nagios
/Redis
/Solr
 ITインフラ
 セキュリティ
公開サーバーのセキュリティ
 SI
SI
ホームページの作り方
スポンサーリンク
IPアドレス確認ツール
あなたのグローバルIPアドレスは以下です。
216.73.216.171
HTMLの表示色確認ツール
パスワード生成ツール
文字数のプルダウンを選択して、取得ボタンを押すと「a~z、A~Z、0~9」の文字を ランダムに組み合わせた文字列が表示されます。
ここに生成されます。
スポンサーリンク
Copyright (C) 2007-2024 zealseeds. All Rights Reserved.